Sunday, May 26, 2013

Pacific Heights Crab Shack

I have been craving crab for the last three months.  Crab dipped in warm garlic butter....yum...  The last time we had crab was four years ago, fresh off the dock in Tofino, BC.  We cooked it up in our beachside cabin.  It was divine.  So you can see, not just any crab would do.

Then recently a new friend/neighbour had been posting on Facebook about the fish and crab her husband had been catching locally.  I remembered back to last summer when we saw guys plucking crab out of the ocean at Centennial Beach - maybe it was possible for us to do it too.  Serendipity brought it all together when the local homeschooling community posted about the lowest tides of the year happening Sunday at 2pm.  Perfect.

I bought an ocean fishing license online and read all the rules of crabbing.  We were only allowed to bring home 4 crab per license.  They had to be male and over 6.5 inches wide across the back shell.  My friend's husband told us all about baiting crab traps and nets and stuff, but we are ghetto fishermen so we brought BBQ tongs and a bucket.

We hit the somewhat rainy beach today with our 'gear' and a few friends who wanted to witness the craziness we had got ourselves into.  There was a big hike out to the ocean.  The tide had gone out REALLY far.  Once we hit the ocean we saw a few other guys with nets so we knew we were on the right track.  We went in up to our knees and wandered the shoreline.  It didn't take long until we found our first one.


Sadly, he was only 6 inches across and he had to go back. 

Our second one was huge!  The biggest one of the day.  He sure was feisty.  We had to watch Annie's nose.  She really wanted to protect us from the scary beast.


We started a crab fight.


It was great fun.  We caught three.  A kind fellow fisherman who had reached his limit gave us two - one of which was a tad too small, but we were only allowed to take four anyway.

photo care of Angela D'Eon 2013

We were just blown away at how easy it was.  No special gear was needed.  You can see our bucket and tongs above.  Yes, a net would have been nice, but we did great without it.  We caught our own dinner!  Can you believe it?  I am still in shock.  Pluck some crabs out of the ocean.  Done.

Here is our final catch...


And then it was time for cooking...


And fifteen minutes later....done!


I think the hardest part is taking out all the sweet meat.  Luckily I have a husband that doesn't mind getting his hands dirty.


This is what two crabs worth of meat looks like.


Sorry there aren't any more photos of food.  We dipped it in garlic butter and ate it.  The end.

But we couldn't eat it all.  And there is two more crabs left!  Tomorrow there will be crab cakes and the day after that there will be grilled cheese sandwiches with crab.  Oh my.  Yes.

Wednesday, May 01, 2013

Respect Your Elders

Even though we are on our way out of cold season, it is time to start planning for the next bout of illness. One of my favourite cold remedies is Elder.  Elderflowers and elderberries can be used in teas, tinctures, honeys, and syrups.  Right now is the perfect time to gather the flowers.  You probably have seen them all around you and never knew what they were.  Tiny white blossom bursts in a cone-shaped formation on large bushy trees.  They seem to line the highways and roadways.  They are sun seekers - you will not find them deep in the forest. They always seem to pop out the same time as the cherry blossoms, but don't get the same fanfare, except from me.  I get so excited when I see the first cones.  It is time to make medicine!


Do you see the white cones above?  Here is a close-up:


Snip off the blossoms, just below the cone.  You don't need the leaves.  Fill a jar:


Bring it home and admire the loveliness while you decide how you want to proceed...


I have made honeys, tinctures, teas and syrups.  They all are great in their own ways.  Honeys and syrups are sweet and therefore are easy for kids to take.  Dried blossoms for teas are nice to have on hand for when you want something warm.  Tinctures are quick and simple for adults in need of a remedy. But liqueurs are the nicest way to take your medicine.  I have found that when I am feeling run down and need something special to lift my spirits and my immune system, there is nothing like a small cup of elderberry/elderflower liqueur on ice to warm your insides and banish the bugs.

The process for tinctures and liqueurs starts out the same.  Fill a jar with blossoms (or berries), and cover with vodka.  Any vodka will do.  Let it sit for 6 weeks to allow the alcohol time to draw out the medicinal properties.  Shake jar every week to ensure that all surfaces have been touched.  After the six weeks (or longer) strain out the blossoms and squeeze out any excess liquid.  You now have a tincture. If you want to make a liqueur you can add sugar or honey.  Honey adds additional medicinal properties - local honey is even better!

I happened to have some berries left from last summer hanging out in my freezer.  You see, the easiest way to remove the berries from the toxic stems is to freeze them in a bag and then smash the bag around and the berries release from the stems.  


These are blue and black elderberries.  The blossoms shown above produce a red berry.  The red berries are not as sweet and palatable as the black and blue - but the blossoms are just fine for this project.  I want to let as many flowers turn to black and blue berries - I can't waste my secret stash!

I followed the same process with the berries - covered them with vodka (supervised by Chief of Quality Control - Mr. Simon).


Now all three jars are ready to be tucked into a cool dark cabinet for the next two months.  The berries seemed to have settled, didn't they?


Try your hand at other liqueurs...blackberry is another favourite around here!

Also....Happy May Day!  My little helper and I had such a great time in the sun, breathing the fresh floral air and snipping the cones.  I think gathering elderflowers is going to be my new May Day tradition.


Saturday, April 27, 2013

Last Minute Knitting

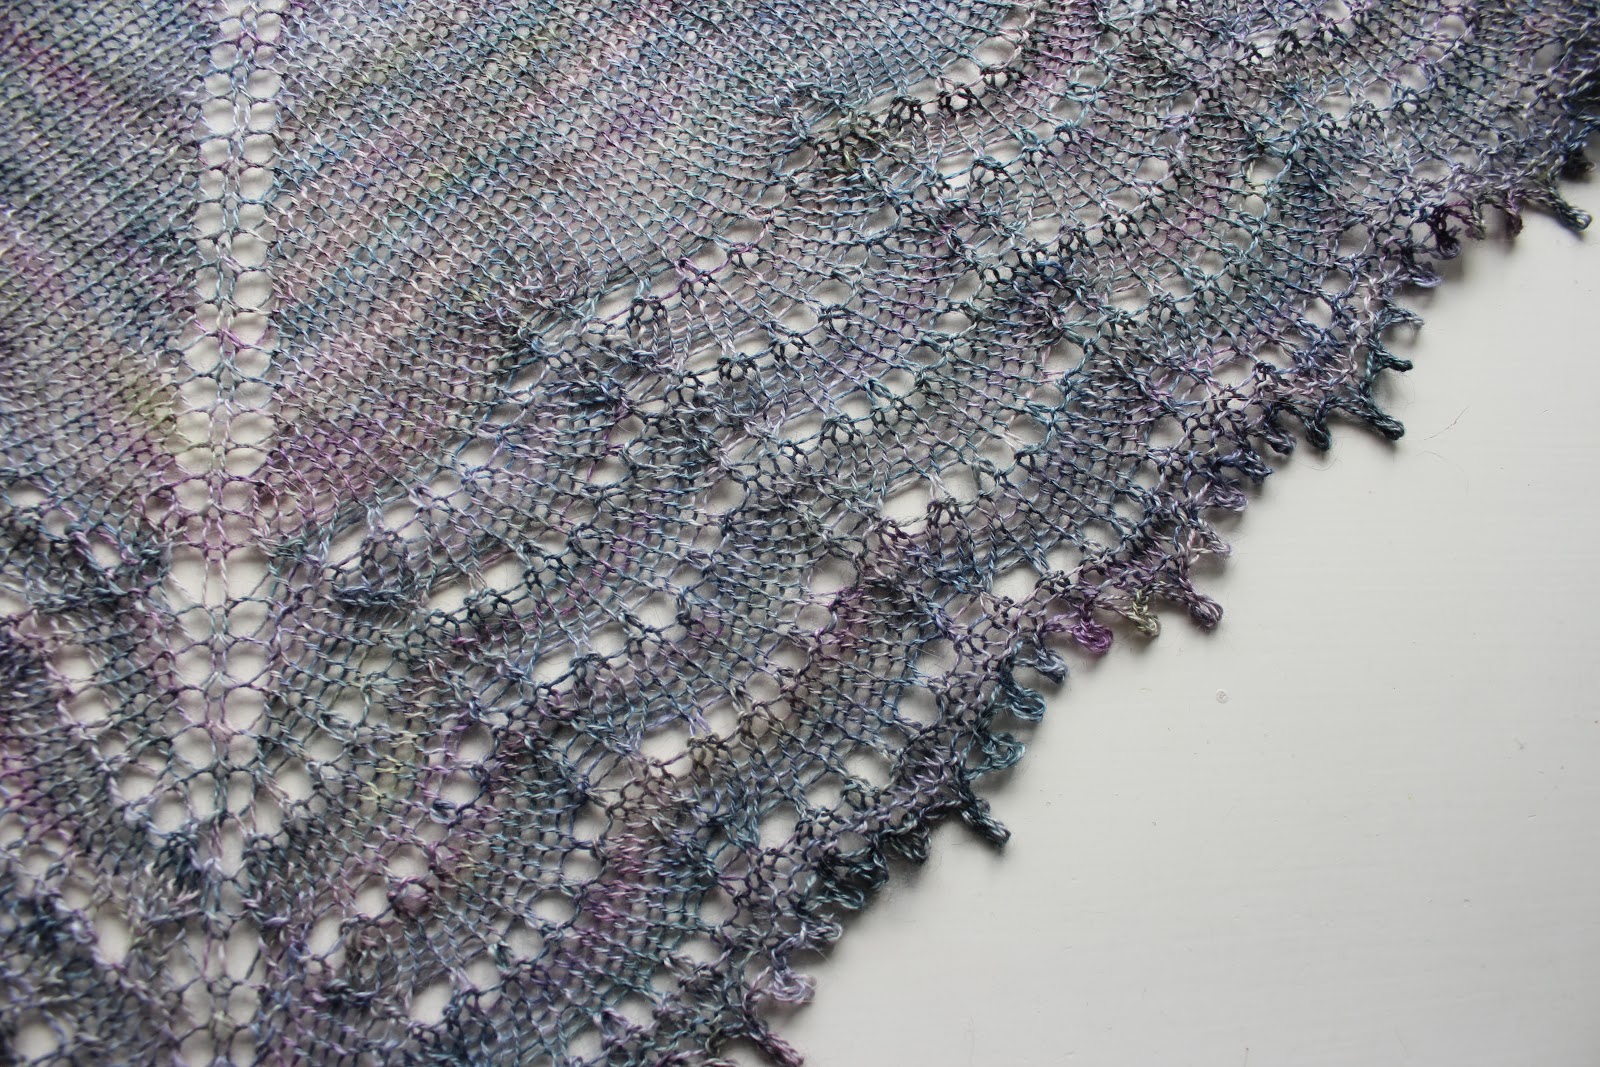
I am on a race against time to get ready for an upcoming vacation.  I took on a last minute project for a lovely cousin-in-law that we will be visiting - it will be her birthday.  I needed to make something light, as she lives in a warm climate.  I was leaning towards lace in a natural fibre.  I searched online through all sorts of patterns.  I saw a few that I liked but none were perfect.  The amount of patterns was overwhelming so I gave up and headed to Three Bags Full to find some lace yarn in hopes that I would be inspired there.  I was lucky to love the first skein I picked up and just below the display was a sample shawl knit out of the same yarn.  It was exactly what I had pictured in my mind.  Even more lucky - the pattern was free on Ravelry!  Sold!

This Malabrigo yarn is beyond soft.  Silk and baby alpaca make a divine combination.  The colour is amazing, too.  I was looking for a light grey, but this yarn has subtle undertones of pink, purple, blue and green - kind of like the inside of an oyster shell.  The silk content gives it a bit of a gloss, also like the inside of an oyster shell.


The knitting was easy - it is a very simple pattern.  The lightweight, soft yarn was gentle on the hands. I had to make sure to do the lace parts at night or when the kids were away so that I could count out the lace.  I did make a couple mistakes, but I don't think that the average eye will catch them.  I love knitting lace because it is so magical.  You follow the instructions and you end up with the crumpled mess below.


Then you stretch it out with a million little pins and wires...


And you are left with a most beautiful spiderweb.


I loved it so much that I bought a second skein of the exact same yarn to make the exact same shawl for myself.  It is so light and soft and luxurious - everyone needs one.

I had also signed up to do a kids clothes sewing challenge this week, but this shawl took over my days.  I needed to get it done on time!  I completed two days of the sewing challenge (Monday and Tuesday) and then fell off the wagon.  Tomorrow is the last day of the challenge and I hope to finish at least one of the projects I started.  I'll let you know...

Edited to add:  No sewing happened.  Oh well, there are only so many hours in a day and small children are calling...

Tulip Trip

Last weekend we drove to Mount Vernon, Wa to see the famous tulip festival.  It was as amazing as everyone had said, and despite the intermittent rain showers we all were blown away.  These are some of my favourite photos from the excursion...


I bought a new digital camera (Canon) over a year ago but I have been too scared to take it anywhere.  I knew it would be worth it, so I brought it with us on this trip.  I fell in love.

Wednesday, April 10, 2013

Lotions and Potions

Three years ago I took an herbal medicine course with Garliq at his Urban Herb School.  I spent eight months (two classes a month) foraging for plants, roots, flowers and berries and then making them into teas, tinctures and salves.  I re-learned the skills that my Austrian Oma had but didn't get the chance to teach me.  I now have a cupboard full of tinctures and oils that can cure most everyday ailments.  We have a few family favourites, and I will share those as we move through the seasons.  It is almost elderflower time!

Recently I Spring-cleaned my cupboards and I came across a few bottles of magic that needed processing.  I found a jar of calendula soaking in almond oil and a bottle of St. John's Wort also in almond oil.  I had forgotten about these, but luckily they hadn't gone 'off'.  I think it was the cool, dark cupboard and the vitamin E oil on top that preserved the medicinal oils.  I left them on my counter to remind me to play with them and yesterday was the perfect rainy afternoon to putter in the kitchen.


The calendula oil was slated to become a cream.  The calendula I grew in my garden (that's my urban calendula garden above).  Some of the original flowers came from seeds that Garliq shared with us from his community garden.  I pick the flowers from Spring to Fall and let them dry in a paper bag - shaking them every once in awhile to ensure they dry evenly.  I don't pick all the flowers, though, as I like to collect seeds at the end of the summer.  Some of the seeds get thrown back under the flowers to ensure a hearty harvest.

I haven't had any luck with making medicinal oils using fresh ingredients.  The moisture in the leaves and flowers can make your oils rancid.  I have had many jars bubble up and smell just nasty.  But I learned from my mistakes and now use only dried flowers, and I haven't had any turn rancid since.  Fill a jar with your blossoms and then cover with oil (make sure that no little bits are sticking outside of the top of the oil as this can also lead to rancidity).  At the school we used olive oil, but I found that the olive colour and smell take over the delicate floral nuances, so I switched to a light almond oil.  If you are in a rush, you can cook the oil with the flowers right away, but I prefer letting them slowly steep on a window sill for about six weeks.  The calendula oil I found in my cupboard had been there for about 8 months.


In the past I have used Rosemary Gladstar's recipe for creams.  It is a great recipe but I wanted to try something new and was inspired by recently meeting the lovely Leona from My Healthy Green Family and decided to give her recipe a try.  It works so well, and she describes the process much better than Rosemary.  I made a few amendments because I was making a calendula cream, but essentially the process is the same.  My strained and measured calendula oil went into a pot with the measured beeswax.  Once the beeswax had melted I poured the mixture into my blender with a few drops of vitamin E oil and rose oil for added scent.  As it cooled to room temperature, I boiled some water and dried calendula on the stove and then let it steep into a lovely infusion.  This infusion was strained and allowed to cool to room temperature as well.  Then it is time for magic!  Start up your blender with the oil in it on a low setting and pour the infusion in a slow steady stream into the middle of the whirring oil.  In a few seconds it creates an emulsion and you have cream!  If you have ever made mayonnaise, you will have see the same reaction.  Keep pouring and blending until the infusion is all gone.  I then scraped down the sides of the blender to make sure all the goodness was incorporated.  Blend a few seconds more and it is all done.  Pour into glass jars. I keep one small jar in the bathroom for regular use and keep the rest in the fridge because there are no preservatives like in store bought creams. Refill small jar as necessary.


So far, I really like My Healthy Green Family's recipe.  The texture is more like a traditional cold cream than a lotion.  It absorbs well on my hands.  I forgot to try it on my face this morning - will do tomorrow.  Next time I think I'll add more than ten drops of rose oil.  I like my cream to have some scent - a small luxury.  This calendula cream will have many uses - it is a healing cream, with anti-viral and anti-inflammatory properties.  I can be used on rashes and bumps and bruises.  I am excited to have it in my medicine chest for emergencies and for daily use of dry skin.

My second project was to make use of the St. John's Wort oil that was also lingering in my cupboard.  The St. John's Wort blossoms were collected on a remote road on the way up to Rock Candy Mine near Grand Forks in the summer of 2011. The long forested road was lined with tons of these tiny yellow flowers.  It was so beautiful - I couldn't resist to bring a few home.  Did you know that these little yellow flowers have a secret?  They may look bright yellow, but are actually red inside!  So if you make a tincture, tea or oil, the result will be pinkish-red.  We all know that St. John's Wort is commonly used to treat depression.  A tincture is great to banish the blues. But those sunny yellow flowers can not only help make you smile, they can also relax your muscles and sooth burns - which I find kind of funny because the medical community tells us that St. John's Wort can make you more sensitive to the sun. If you subscribe to homeopathic thinking then you will know that like treats like; and therefore something that would make you more sensitive to sunlight would also treat the adverse effects of that sunlight.  St. John's Wort also has anti-bacterial, anti-fungal and anti-inflammatory properties - perfect for burns and rashes.

I didn't use a recipe for the St. John's Wort salve.  A salve is simply an oil mixed with beeswax.  The beeswax gives the oil some structure so that it is easier to handle.  The amount of beeswax used depends on how hard you want you salve to be.  I strained the blossoms out of the oil and put it in a pot on the stove.  There was probably a cup and a half of pink oil - I wish I took a picture so that you could see the amazing colour.   I added 1.5 oz of beeswax to the pot and let them melt together.  I did a test (take a spoon and dip it in the warm mixture and put it in the freezer for a few seconds) to see if it was the consistency I wanted - I didn't want a solid rock; I wanted it soft, but not runny.  It was perfect.  Pour into glass jars and allow to harden.  The end.


You can see the pink tinge in the photo above.  So pretty and smells great on it's own.  Let's hope it works!  California is calling us and we may be in need of the sunburn salve in the near future.

Wednesday, April 03, 2013

Spinning into Spring

I'm back!

The Spring sunshine and making some new crafty friends has really boosted my creative energy.  I've been sewing a lot lately. Banners, pjs, hats and other odds and ends. Knitting has taken a back seat for a little while.  I started a pair of trilobite-patterned socks that really hurt my hand to knit.  I'm almost finished the first sock, but I am not motivated to start the second.  I need something more mindless than counting and knitting a complicated pattern. I need some instant gratification - hence the sewing.  Another of my favourite instant gratification projects is spinning wool.  Spinning is very mindless and meditative.  I was gifted a bag of cornflower blue and dandelion yellow locks that were staring me down so I decided it was time to play with them.  I hand-fluffed the blue locks and roughly spun them into singles.


Next, I needle felted the yellow locks into small circles - little dandelions!


The needle felted flowers were then threaded onto short lengths of the blue singles.


Simon decided that they looked like eggs that needed hatching. You gotta love the furry friend helpers...


I plyed with a thin blue thread and added the threaded flowers at random times.  Spun all together, I think it looks like blue sky and bright yellow dandelions.  Pure Spring!


I think it is going to make a great hat.  I also think I need to spin some greens and browns to make a grass like band for the hat that will be overflowing with dandelions. What do you think?

Tuesday, May 01, 2012

Grrr.

I have tried posting twice. The Blogger app sucks. It puts all the photos together at the end of the post. And the photos are right justified and oddly sized.

Grrr.

Thursday, December 08, 2011

Another Grateful Post

I need another reminder of the blessings in my life. I need to do this more often.

Today I am grateful for:

1. Two hours of kid-free time to take a pilates class to strengthen my body.

2. The person that invented infrared saunas. They are the answer to all of the problems of cold people in the world.

3. Lego. A good distraction for little people but also for big people too.

4. Food Trucks. Tiny yummy things make my tummy happy.

5. The little people who make me laugh.

Tuesday, November 29, 2011

Bad Day

Today I had a bad day. While I don't feel like I have much going for me at the moment, I need to practice some gratitude.

Today I am grateful for:

1. The health of my husband, me and my children.
2. The random phone call from a family member. Talking to another grown up was heart warming.
3. The children not fighting.
4. Quite time after the children are asleep, mending and watching a fabulous movie.
5. The rain on my face on the multiple walks up and down the hill, and the week of sunshine starting tomorrow. It can only get better.

Thursday, September 08, 2011

Apple Saves the Day

Now that there is a blogger app, I just might post more often! Thank you apple gods!!!

And...the smallest of the littles is in preschool twice a week! I will have five whole hours to do whatever I want. Like...a yoga class, or painting, or other craftiness. Woohoo! Let the party begin!!!

Sunday, June 19, 2011

A New Love

I have found a new time-suck. Pinterest is the best thing since Facebook! It reminds me of twitter, but with pictures instead of words. Twitter bores me unless I am looking for specific information. There are so many people whining and complaining. There is too much doomsday talk - my nerves can't handle it.

But Pinterest...it is beautiful. So many gorgeous and intelligent images to sift through. It makes me happy and excited to create new things. I like that I can keep track of projects I want to make with pictures instead of links to websites.

Look for me if you are there too. So much fun!

Sunday, May 22, 2011

A Short Story

Once upon a time there was a strange little snail that magically appeared on a black automobile. He didn't know that how he got there or what was going to happen so he just kept doing what snails do - sliming along.


Despite the car moving and the torrential rains, the snail kept on sliming.

In his mind, he slimed all the way from the top of the car, down the window, and down the door - but in reality he slimed all the way from Richmond to Downtown Vancouver in 25 minutes. Pretty fast for a snail. At the end of the car ride a beautiful princess carried him to the nearest greenery for a snack and the opportunity to keep on sliming.

The moral of this story is that no matter that life throws your way, keep doing what you are made to do and you will end up where you are supposed to be. Just keep on sliming.

Thursday, May 19, 2011

Gratitude

When Miss B was newborn I had a lot of trouble feeling like what I was doing was worth something...anything. In order to feel more accomplished I kept a small calendar where I wrote down what I did everyday. Little things like walking to the store, having a visitor, going to the doctor. I liked seeing the filled up pages. It reminded me that I was doing things. I felt useful.

Being a stay-at-home mom can be monotonous and boring. I very rarely talk to other adults, other than nods and smiles in the school halls or the cashier at the grocery store. I do laundry and clean up toys. I play endless games of Transformers. I make three meals and many snacks everyday. I am feeling disconnected again. I need to start keeping track of the things we do, the things I am grateful for. My thinking is that if I only type a few things a day, maybe I'll get into the grove of blogging again.

I am putting out the the universe that I am in need of a new tribe. My old tribe has disbanded due to divorce, different schooling practices, kids of different ages and moving to other countries. I am desperate for people that like the things I like, parent the way I parent and laugh at the same things I laugh at. Is it too much to ask? Yes, but it doesn't hurt to ask anyway.

So... today, I am grateful for the courage I had to open the computer and type this while the smallest kid is distracted by (natural) cheesies and tv. I am so happy the sun is back and drawing us outside. We made it to the library and to Miss B's musical performance despite multiple tantrums. We had a quick family dessert outing for icecream and ate it on top of the Wall Centre's perfectly manicured grass.

See, I did do something today. There were a few wins. :)

Sunday, November 21, 2010

Achtung, fertig, los!

laptop, check.
downloaded classes, check.
major sewing projects out of the way, check.
cleared desk space, check.

okay.

so now what? time to start painting!

this is scary.

go, go do it. you can do it. go!

Wednesday, September 08, 2010

Back in the Saddle - again, really!

I inherited a laptop!!! I am hoping this will make blogging a heck of a lot easier.

I also started an online painting and drawing class. This class requires some journaling and I thought this would be a good place to do these entries. I can post some pictures of my progress in the class as well. I have drawn and painted before, but long ago. This is a mixed media class where I am hoping to incorporate my fibrey goodness as well. Wool locks, fabric, knitted pieces. Who knows?

So...about the class. I found it by accident. I was checking out the blog of a lovely lady I met on our italy trip 4 years ago. 4 years? Holy shit! I still think about that amazing adventure on a daily basis. Anyway.... Jennifer posted some cute pictures of folk art painting she had done. SO cute. I had to learn how to do it too!

I signed up for Suzi Blu's online class. Videos and online chats. I was so excited to start. I was beaming inside. I couldn't think of anything else. Buying supplies was the first challenge. I want to do this class for me, and therefore I wanted to go shopping for paints on my own as well. Not so easy with a cling-on toddler. Had to do it on a weekend while he was napping. I think I am just going to take him next time. Too much time wasted waiting to get alone time. And now I have run out of titanium white and I need it to move forward.

All was going well with lesson 1 - colour theory (which I covered in grade 9 anyway) and then I decided to google Suzi. Out of curiosity. Stupid move. I found a whole whack of hate posted about her online. Great stories about how she used to be a porn actress and is untrustworthy and fake and makes fun of all her students. This is not good for a person with anxiety issues. I never went to art school because I was terrified of being critiqued, so I studied art history instead. Sitting in a dark room looking at slides was easier than standing in front of a class and having them tell you everything that is wrong with your art. I was traumatized by my findings about Suzi. She seems so cute and quirky in her videos. Slightly unstable, but what truly creative person isn't? Well, I have decided to ignore what I found. She may have burned someone in the past and with the power of computers it is spread all over the interwebs. Sad, really. I feel bad for her. Who hasn't hurt someone's feelings in their past? Who hasn't been hurt, themselves? But why post it publicly? So mean. So very, very mean.

Now it is September. School has started for Miss B and school will start for me too. I need to finish cleaning up my workspace and buy some more titanium white. Then back to the colour scales. I am way behind, but i can catch up! Journal entries to be added shortly.

Thursday, July 02, 2009

back in the saddle

In all the craziness of the last year, we moved to a new house. Still in the same complex - but a house! We have the top floor and attic of a lovely Victorian that has belonged to many different people over the years but started out as one of a row of houses for railroad executives when Vancouver was growing into a city. The house was overhauled about 20 years ago, and made into two suites. The old lady that lived in our suite before us was NUTS! The entire place was painted purple. Three different shades of purple. And hot pink (the kitchen). And peach (the bathroom). I wish we had photos, but she was required to paint it back to white before she left. She also tried to blackmail us into paying her $1000 for updates she did to the house 20 years ago - a window she put in, the attic she finished (very poorly, I might add), a really old washer, dryer and dishwasher that she didn't want to remove. We refused to pay her, as this is a co-op, and in return she siliconed the windows shut, and tried to smash holes in the attic walls. Thank goodness she was frail and couldn't do much damage. We (i.e. me and my dad (Opa)) did alot of mending to make it "ours". Bamboo laminate in the attic, fresh colours (not purple) in the bedrooms. The co-op gave us new carpet and lino throughout the house - lucky us! New light and bathroom/kitchen fixtures. We bought a new washer and dryer (my first ones!) and dishwasher through great sales over the Christmas holidays/economy slump. I feel so grown up having a washer and dryer in my own home! Sadly, the front porch belngs to the unit below us but we do have a view of the ocean from a few windows and we will be able to see the fireworks from our balcony off the attic.

My big yellow house in the Winter....


My big yellow house in the Spring....we have a lilac tree out front!


Have I mentioned that I love this house? The layout is so much better than our last place - everything on one floor. The only thing that bugs me is the bathroom. It is like a hotel bathroom - narrow and squashed into the only space they could find. It is in the centre of the floorplan, and as such, is party central whenever I need to "go". I hate having an audience.

The attic space is a playroom/craftroom/office. The office part is the part that is allowing me to post here again. My computer was in the bedroom, but the baby naps in there so I never got any typing time. Now my computer is in the attic on my crafting table so I can type while he sleeps. I have so many updates to catch up on. I am looking frward to blogging again and not just reading everyne else's!

Wednesday, March 25, 2009

It Happened..a year ago....

So it has been a year (well, 15 months, now...) A VERY BUSY year. I was going to post on my due date which was the 26th of March 2008, but I started to go into labour that night. Early labour - nothing to crazy. I called the midwives and the doula around 11pm to give them the heads-up. I had the doula come over shortly after because I was getting nervous. She slept in the other room until early in the morning when things started rolling. She called the midwives and they came to check me. I was in agony, but only at 1cm. My dear son was punching my cervix with his very able little hand. I only wanted to be on the bathroom floor. Moving was no good for me - I needed the safety and sturdiness of a floor. The bathroom floor was cool and comforting - but tight for a birthing mama, a doula and a midwife and her student. Miss b and papa hung out in the living room and made a welcome banner. She was very calm through the whole process. I remember her coming in a few times and stroking me gently. She listened from downstairs for my sounds changing. I was LOUD and VERY FOUL MOUTHED. It hurt alot and I tend to panic. We used lots of homeopathy and it calmed me. Through transition I moved back to bed. I didn't want to lie down anymore, and the cold floor wasn't doing it's job. I found the word "out" and used it frequently. He came rather quickly after transition - only 15 minutes of pushing. The back-up midwife made it just at the end. My boy got stuck just past the shoulders, which is unusual (they usually just slither out). The student asked if she could pull him, and he came out with a tug. He was a very big, chubby boy. The biggest cheeks you can imagine. 9.5 pounds of him birthed at home without any drugs. Oh my!

Then...


Now...

Thursday, March 20, 2008

Will this make it happen????

I am less than a week away from my due date, and I am so ready to have this baby. He's so heavy! And I am so bored. I have finished 95% of my projects. (I can't finish them all as it gives me the heebee-jeebees - I am oddly superstitious that if I finish them all that I won't be around afterwards). I'll show you the projects that I have finished. The quilt that needs to be hand quilted and the home-made fitted diapers and wool sweater diaper covers that need snaps are to left to the imagination for now....

But before the projects, I have to show you this cute picture of one of my snuggle-bug cats, Simon. He has been super clingy all through this pregnancy. When I am at the computer he insists on being held like a baby in my lap, or up on my shoulder like you would burp a baby. If I sit on the couch he is magnetically attracted to my big warm belly. At night he sleeps on my belly/back, as I sleep on my side. This is me sittin gon the couch cross-legged and knitting, with a belly warmer:


Knitted Wool Diaper Covers


I forget which pattern these are, but I know I got it from Anna! They are lanolized and ready to go. I hope I did the lanolin correctly. The process is simple, but I have never done it before. It is so hard to tell if they'll work. I'll just have to try them out and hope for the best. Jumping into cloth diapers and wool covers is a new thing for me. We used disposables for Miss B. Now we know better and plan on keeping all that plastic out of the landfills.

Home-Made Pre-folds


I made these small pre-folds out of a stack of old t-shirts. The inside centres are padded with the pink t-shirts that I just can't put on a boy bum. I kept the more neutral colours for the outsides. They sure are soft. They were amazingly simple and easy to make. I love my serger!!! I hope they are absorbent enough.

I made some larger ones, too. Home-made tie-dyed t-shirts will look so cute on a baby bum, especially this summer!


I made some black ones too, but they didn't look good in the pictures. I can't wait to see them on. A little punk rock bum!

Dyed Indian Cotton Pre-folds


These were unbleached indian cotton prefolds that I bought from a local diaper retailer. I wasn't going to dye them, but after I dyed the motherese from the last post, I just couldn't stop myself. The colours ended up more muted than the motherese, but I think it has to do with the colour of the unbleached cotton. It could also be that i only washed the pre-folds 10 times before I dyed them and there may have still been some oil left on the fabric that prevented it from absorbing as much colour. Oh well, still cute!

Another Pair of Longies


I love this pattern. It is so simple - a great brainless activity. I must make more....

The Bag


I made this bag out of nothing. I made up the pattern. Well, actually, I didn't even use a pattern. I just cut out pieces that I was hoping would fit together. The dark grey corduroy came from remnants of a project from before Miss B was born. We had inherited a car seat from a friend, but the cover was ghastly. At nine months pregnant I had decided to recover the car seat with the lovely grey cord. I tried and tried, but I couldn't make it work, so my pregnant self resigned to paying a dress-maker $100 to finish what I started. I should have just bought a new damn car seat! But it did turn out beautifully and we are going to use the car seat again for this baby, so I guess it was worth it. Anyway, the leftovers are the outside of this bag. The inside is a really great 1970's sheet that I found in our co-op's share-closet. I made lots of pockets on the inside. I tried to take a picture of the inside, but the pattern and all the pockets were too hard to figure out visually. I added a quick-release buckle to the strap after a few different attempts at making the strap. It isn't adjustable for size - I'll leave that for another time when I am not pregnant. Other than that, I am quite happy with it. I guess it will be a diaper bag. It looks like a diaper bag. I did buy a diaper bag (well, actually, it is a really cool bag from Lululemon), but one can never have too many bags, non?

Art Books


This project has been years in the making. My very artistic daughter draws all the time. She started taking paper from the printer as soon as she could draw on her own. I have collected all those pages of printer paper over the years and wanted to do something with them. I did some research and found a lovely little company on the North Shore that does binding of small projects. I organized the drawing by date and they bound them like real books. Miss B was so thrilled with the result. She sat and looked through everything. I tired to name all the drawings, especially the ones she gave me titles for. She seemed to remember them all. She even knew what the non-descript blobs of early drawing were. We plan on doing this every year. It is totally worth the $50/book.


So this is the end of the projects! I did make some slings - a few stretchy, a few woven. I also made a wrap. They are not worth photographing until they have a baby in them! The diapers I made are really cute, too, but they need snaps. I really need to find a snap press to borrow to do the plastic snaps.


I cleaned off my work table in my bedroom. It has nothing on it. No more piles of projects, no more sewing machines. Just a lamp. It is all ready for the midwives to put their gear for the birth. So what am I supposed to do now? How about get a pedicure with my darling daughter?

Baby Jaguar Toes


Cherry Blossom Toes


And now we wait. And wait. And wait. And wait..........